Objective: Although quality art products make for a more effective final piece, Styrofoam printing can happen with some pretty basic materials that most will have right at home. This is a fun one to experiment with. Turn your children’s designs into a set of homemade greeting cards or try printing on different surfaces- such as a canvas tote bag or t-shirt!
Materials: thin paper for the initial drawing- such as copy paper, pencil, Styrofoam (think the bottom of vegetable or meat trays obviously washed REALLY well), craft, tempera or acrylic paint, paintbrush (foam), a spoon, white paper (watercolor or smooth surface).
Instructions:
- Optional: cut the thin paper to the size of the Styrofoam you’re using and draw a design you would like to work with. For the little ones, think simple shapes and patterns, rather than anything too detailed.
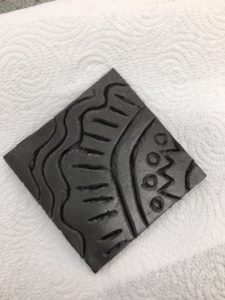
- Place the drawing over the piece of Styrofoam and trace over the lines with a pencil, the end of a paintbrush, chopstick, etc.… Press down firmly to transfer the lines into the Styrofoam, but not so hard that it rips it apart. The goal here is to create enough of an indentation so that the lines created don’t accept the paint once it’s added. *You can skip the above steps and simply press your image directly into the Styrofoam if you wanted.
- Spread the paint using a foam brush in a thin and even layer.
- Position the Styrofoam on top of the paper or card that you’re working with. Use a spoon to press and rub the backside to help transfer the design. Be careful not to let the Styrofoam move around.
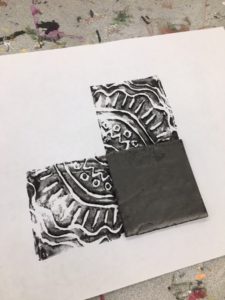
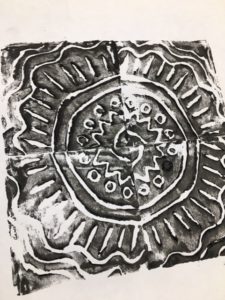
Extra: Create a design that is ¼ of a radial symmetry mandala. As you print with it, turn the image to create the design in entirety (see pictures).