“Salty” Portraits
Objective: As parents, we want the best for our kids and that includes developing their creativity. But what if your child just isn’t into art. We obviously don’t want to force it, but there are certainly ways we can encourage artistic exploration that that goes beyond simply drawing and painting. Perhaps they haven’t figured it out yet, but there is probably an art form they will gravitate to if given the opportunity. How about photography, cake decorating, tessellations or other math focused art, sensory experiences, pottery, etc..? Just remember, art will likely be appealing to a child, depending on how YOU present and guide their experience with it. Here’s a project that puts a fun and unique spin on the theme of portraiture. It’s one we like to do especially with students that say they just don’t like art, or say they “can’t do art.”
Materials:
- Heavy weight paper- cardstock, poster board, cardboard, watercolor paper
- Pencil
- Mirror (if doing a self-portrait) or someone to sit for you
- Liquid Glue
- Salt
- Food coloring or liquid watercolor
Directions:
- Draw yourself however you would like. Try to take up the full extent of your paper and keep details to a minimum (you will see why in the next step).
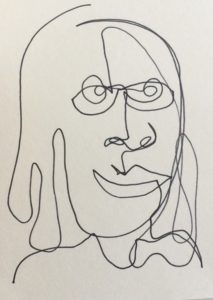
- In the examples below you will see that we chose to draw in the style of a “blind, continuous, contour line drawing.” This may be a mouthful, but it’s pretty simple. The rules is you must draw yourself without peeking at your paper but looking at your face in the mirror the entire time, for approx. 30 seconds and without lifting your pencil off the paper.
The result is one long continuous line. This method will force your portrait to be abstract, and the result is often humorous – which adds to the fun of it.
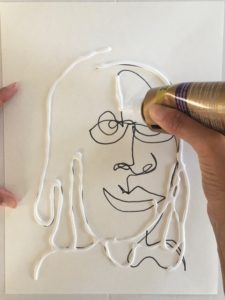
- Trace over your pencil lines using a bottle of liquid glue. *A different approach is that you can make this the very first step- just draw your portrait with glue, skipping step one.
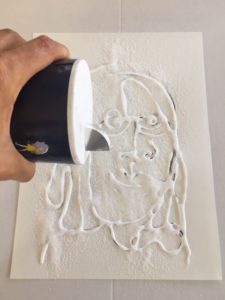
- Sprinkle your design with salt until all the glue is thoroughly covered. Shake off the excess salt.
- Dip a paintbrush (or eyedropper) into the food coloring or watercolors and gently touch the color to the salt covered lines. It is important to barely allow the brush to touch the glue/ salt or you risk smudging the line. Watch the paint “magically” travel in both directions.
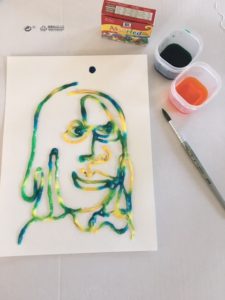
- Let it dry completely. This drying process may take a day or two depending on how much glue was used.