Objective: If your child has ever proudly pointed out something they’ve made, and you have absolutely NO idea what you’re looking at, then you’ve already experienced Process Art. This type of art thrives without boundaries and celebrates creative freedom. Here is where the creation of the piece, not the outcome becomes the focus. The beauty is that it doesn’t require needing to resemble anything. It doesn’t require coloring inside the lines or the need to have everything in the right place. Among the many benefits of process art, children: will gain confidence in realizing their own ideas and imaginative thoughts, will nurture their social and emotional health, will use creative and critical thinking skills, will experiment with materials and learn their characteristics, and will embrace the idea that mistakes are part of the learning process.
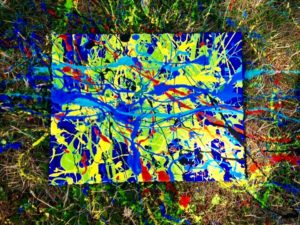
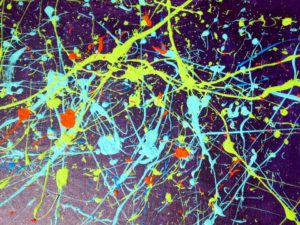
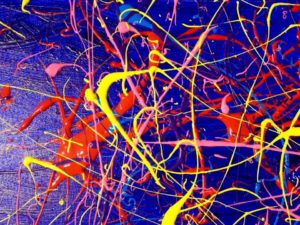
Here is one of our favorites…. Drip Painting!
Materials:
- A canvas, piece of flat cardboard, or any other sturdy surface
- Liquid Glue
- Tempera, Craft, or Acrylic paint in assorted colors
- A cup or bowl for holding paint
- A paintbrush or other tool for applying paint
Directions:
- In your cup, mix your paint and glue in a 1:1 ratio (the glue is what gives your mixture the right consistency for dripping). Each color gets its own container.
- Head outside in the grass. Dip your brush, stick, or whatever else you’ve decided to use into the cup and “scoop” up a good amount of your paint/ glue. Try to create the entire painting by allowing the paint to drip and splatter off the tip of the brush.
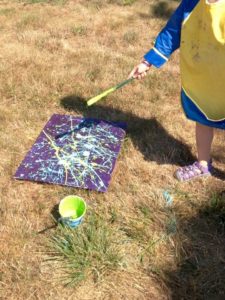
- At this point, it’s complete experimentation: move your arm as if you were conducting an orchestra, try to write your name or make shapes using this technique, see what happens when one color drips on top of another…

- Be patient and allow your painting to dry.
“The greatest sign of success for a teacher is to be able to say, “The children are now working as if I did not exist.” – Maria Montessori
Ideas for process-based art:
- Paint with anything other than a paintbrush: an old comb or toothbrush, a stick, a squirt gun, a fly swatter, a squeegee, wine corks, by blowing through a straw, by dropping paint through an eyedropper, by stamping with leaves or bubble wrap…
- Paint or draw on a non-traditional surface such as aluminum foil. Sharpies work great!
- Try stamp painting using toys, such as brio blocks.
- Drive a matchbox car through a “puddle” of paint.
- Make paints using Jell-O or Kool-Aid mixed with water- smells yummy!
- Top into your engineering mindset and create a pendulum painting.
- Wrap your feet in bubble wrap and get stomping.
- Draw or paint by holding the brush/ marker by your toes instead of your hands!
- Create music.
- Discover the effect of adding salt to a watercolor painting.
- Gather your weekly cardboard consumption and a roll of masking tape to make recycled sculptures.
- Color on coffee filters or paper towels with marker and spray water to see the tie-dye effect created.
- Collage! You can use anything: magazines, tissue paper, leaves, flowers, fabric…
- Build a nature-made paintbrush with a stick for the handle and other natural materials to resemble the bristles.
- Sculpture creation with clay/ playdough/ DIY clay/ Sculpey.
- Paint a rock garden.
- Use a clothespin to make your own paintbrush- clip anything to it (yarn, pom poms, a sponge).
Tips for open- ended art:
- Prepare, prepare, prepare- your space, your child’s clothing, the materials they’ll be using, and your surface. Process art is by nature messy art so the more you can plan for it the better.
- Don’t be tempted to give your child instructions on what to make, and do not show them an example. Allow them to forge their own path. Instead of saying “paint your favorite animal” instead try saying “here are some materials you can use- let’s see what you do with them.”
- Set them loose (with obvious boundaries) to create, with little to no assistance. Try not to “fix” anything.
- It’s rare for kids to have a large block of time to simply imagine and create these days. Make sure your child has as much time as they need to complete their piece.
- Engage in a conversation about what they’ve made, but make sure to keep your comments open ended. Try saying “tell me all about it” rather than “what a pretty house you drew”. You may find out what you thought it was, actually isn’t that at all.
- Ask questions that encourage reflection about the process, such as “how did you decided on those colors”, or “how did you figure out how to attach that”.
- Remember, there is no right or wrong when it comes to process art.