Objective: As much as we at the Museum are a proponent of “Arts for Arts Sake,” we also love a good art project that brings in other curriculums. There is countless evidence that children simply learn best when they are engaged in multiple disciplines simultaneously. We find there is enormous value in creating art that also offers a pathway for further discoveries. In this particular lesson, process art combines with science to make a beautiful painting, while at the same time getting children to ask the question HOW or WHY did it do that?
Materials:
- Shallow pan or other container for holding water
- Oil (any will do)
- Liquid food coloring or liquid watercolors
- Heavy paper such as card-stock or watercolor paper
Directions:
- Pour enough water into your pan so that it just covers the bottom.
- Pour a few capfuls of oil into your pan (experiment with gently swirling the oil around the surface of the water vs. the effect if you don’t mix it around).
- Place your paper on the surface of the water and let it soak up the liquid or about 10 seconds.
- Peel the paper away and lay it on a flat, protected surface.
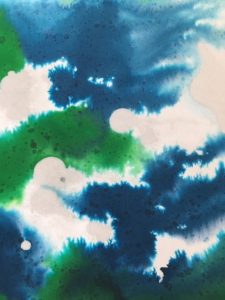
- Drop the food coloring onto the paper. Play around with different color combinations or use just one color. Using multiple colors will have the added benefit of teaching your young artist about color mixing.
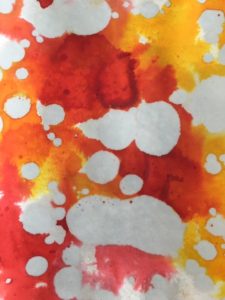
- Try rocking the paper back and forth to move the color around the paper. Notice what happens when the food coloring hits the areas where the oil is soaked into the paper. Let dry.
Extra:
- Why is it that water and oil do not mix? Research to find out.
- Once your bubble painting is dry, draw into it with markers to add details to your background. Maybe it reminds you of planets in outer space or bubbles under water!